
Table of Contents
- Step 1: Run a Physical Inspection
- Step 2: Check Battery Health and Charging Cycles
- Step 3: Verify Software Support and Update Lifecycle
- Step 4: How to Check Warranty Status by Serial Number
- Step 5: How to Spot Fake Electronics Online
- Step 6: Refurbished vs Used Electronics: What’s the Difference?
- Step 7: Research Market Value and Negotiate
- Common Mistakes to Avoid When You Vet Electronics
- Frequently Asked Questions
Last Updated: September 12, 2026
Step 1: Run a Physical Inspection
Physical inspection is the most reliable filter when you learn how to vet electronics before buying, catching problems no listing photo reveals in under ten minutes.
Check the casing for cracks near hinges, corners, and screw bosses, which absorb drop damage. Then test the screen for burn-in with solid white and gray images in a dark room; ghost outlines of menus or taskbars mean permanent panel wear.
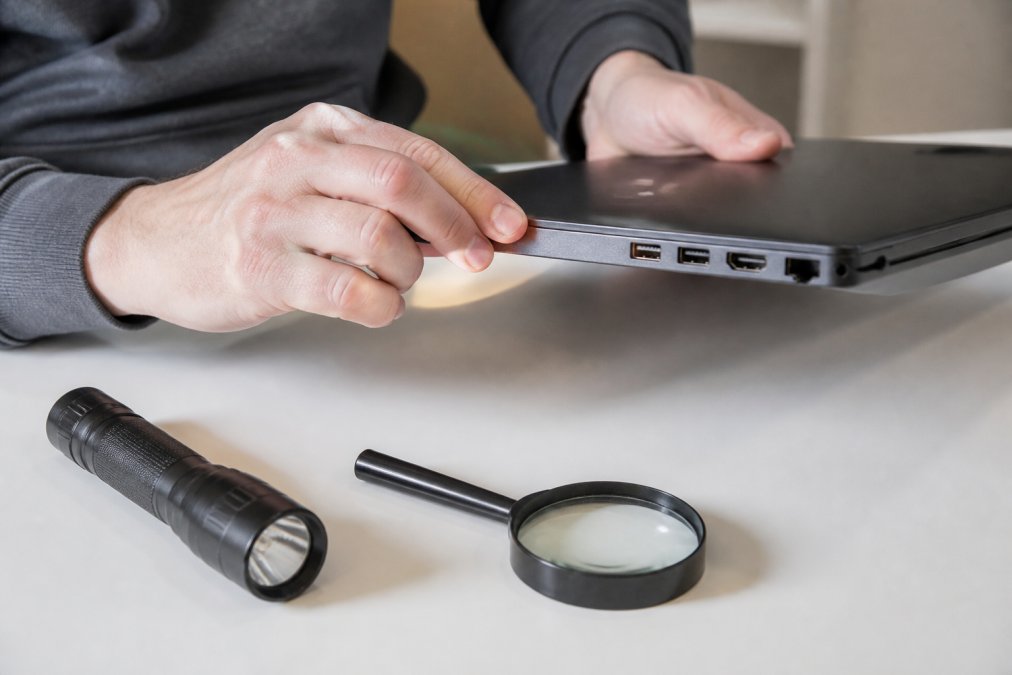
Check for cosmetic damage and wear
- Deep scratches or dents on corners and lid edges
- A wobbling hinge or a lid that will not stay open
- Sticky or shiny keycaps, which signal heavy typing hours
- Cracked bezels around the webcam or display
Test all connectivity ports and buttons
Bring a known-good cable and a USB drive. Test every port, wiggling each connector while watching for dropouts, and press every button and toggle. Confirm the headphone jack produces clean audio in both channels.
A port that works “only at a certain angle” is a failing solder joint. It typically costs more to repair than the discount you negotiated, especially on thin laptops where the port sits on the mainboard.
Step 2: Check Battery Health and Charging Cycles
Battery health is the most expensive wear item on any portable device, and the number sellers obscure most often. Ask for a screenshot of the battery report before you meet, then verify it yourself.
On Windows laptops, run powercfg /batteryreport in Command Prompt for design capacity, full charge capacity, and cycle count. On MacBooks, hold Option and click the Apple menu, then open System Information and select Power. On iPhones, go to Settings, then Battery, then Battery Health and Charging. Android devices vary, so check Settings, then Battery, or use a diagnostic app.
How to read battery health on phones and laptops
Compare full charge capacity against design capacity (microsoft.com). 85% or better is healthy; 80-85% is usable but aging; below 80% means budgeting for a replacement, and that cost belongs in your negotiation.
Test charging speed and port reliability
Plug in the original charger and watch the charge indicator; it should register within seconds. Then gently flex the cable at the connector while watching for the charging icon to flicker. Flickering means a worn charging port, a common failure on phones and thin laptops.
Charging cycles matter more than age. A two-year-old laptop with 150 cycles is often a better buy than a one-year-old unit with 600 cycles, because lithium batteries degrade with use, not just time.
Step 3: Verify Software Support and Update Lifecycle
Software support determines how long a device stays secure and useful, so check it before you fall in love with the hardware. A powerful machine that stopped receiving security patches is a liability, not a bargain.
Check the manufacturer’s support page for your exact model and note the OS support end date. For Windows devices, confirm the model officially supports Windows 11, since many capable machines were left behind by the processor compatibility list (microsoft.com). For phones, verify the device still receives Android or iOS updates. For Macs, confirm the current macOS release supports your model year. If it is outside its update window, treat it as a secondary machine, not a daily driver.
Microsoft’s Windows 11 supported processors list is the fastest way to confirm laptop compatibility before you buy.
Step 4: How to Check Warranty Status by Serial Number
Checking warranty status by serial number takes about two minutes and tells you whether the device is still covered, refurbished, or reported as stolen. Every major manufacturer offers a free online lookup tool.
Enter the serial number on the manufacturer’s warranty page to see the coverage type, start date, and whether the device was sold as new or refurbished. A “new” listing that returns a refurbished warranty record is a misrepresentation that justifies renegotiating or walking away.
Where to find the serial number on common devices
- Laptops: printed on the bottom panel, and also in the BIOS or system settings
- Phones: in Settings, then About, and on the SIM tray for some models
- Tablets: on the back panel in small print, or in Settings, then General
- Appliances: behind the door, on the back panel, or under a removable trim piece
Using manufacturer databases and third-party tools
Manufacturer portals are authoritative and free. Third-party tools can add device history, such as repair records or carrier lock status, but treat their results as a starting point, not a verdict. Cross-check anything surprising against the manufacturer’s record.
Step 5: How to Spot Fake Electronics Online
Spotting fake electronics online comes down to four checks: the price, the seller, the serial number, and the hardware itself. Counterfeiters are good at packaging and terrible at databases, so the serial number is usually where the story falls apart. But serials alone will not catch every fake, because some counterfeiters now clone valid serial numbers onto cloned hardware. You need a second layer.
Red flags in listings and seller profiles
- A price far below every other listing for the same model
- Stock manufacturer photos instead of real photos of the actual unit
- A seller account created recently with little or no feedback history
- Vague wording like “OEM” or “compatible” instead of the brand name
- Pressure tactics, such as “only one left” on a listing that never sells out
- A listing that shows a different model number in the title than in the specs
The four counterfeit categories you will actually meet
Most fake electronics fall into four buckets, each with a different tell:
- Cloned accessories, chargers, cables, batteries, and earbuds. These are the most common fakes because margins are high and tooling is cheap. Check the weight against a known-genuine unit; counterfeits almost always cut material. Check the finish on the connector shell and strain relief, where fakes show mold lines and uneven seams.
- Rebadged low-tier devices, a cheap board inside a shell that looks like a premium model. The serial number may return a valid record because the counterfeiter copied a real one. The tell is the hardware report: run a system information tool and compare the reported processor, RAM, and storage against the official spec sheet. Mismatched parts are a strong signal.
- Refurbished units sold as new, not counterfeit in the classic sense, but a misrepresentation that costs you warranty coverage. A warranty lookup that returns a refurbished record on a “new” listing is the giveaway.
- Gray-market imports, genuine hardware sold outside authorized channels, often with no local warranty and sometimes with region-locked firmware. Check the model number suffix against the manufacturer’s regional variants.
Authentication methods that actually work
- Manufacturer serial lookup. Enter the serial on the brand’s warranty or support page. A valid record confirms the serial exists, but not that the hardware matches it.
- App-based authentication. Some brands offer a companion app that reads a cryptographic chip in the device or accessory and confirms authenticity. This is the strongest check because the chip is hard to clone.
- Hologram and packaging checks. Genuine packaging uses tamper-evident seals and holograms that shift color under angle. Counterfeit holograms are usually flat stickers with a printed pattern.
- Firmware and software strings. Connect the device and read the firmware version in the system settings. Fakes often report a generic or mismatched firmware string that does not match the model.
- Weight and dimension check. A kitchen scale and a caliper will catch most cloned accessories. Compare against the manufacturer’s published specs.
Diagnostic software to confirm what you are holding
Free, cross-platform tools do most of the work:
- HWiNFO (Windows) and System Information (macOS) report the actual CPU, GPU, RAM, storage model, and battery design capacity. Compare every line against the official spec.
- CrystalDiskInfo reads the drive’s SMART data, including power-on hours and total writes. A “new” drive with 4,000 power-on hours is not new.
- Battery report tools (built into Windows and macOS) show cycle count and full charge capacity. A battery with 600 cycles on a “new” device is a refurbished unit.
- USB device viewers (like USBDeview on Windows) show the vendor and product IDs of connected accessories. Counterfeit chargers often report a generic or unknown vendor ID.
The serial number is your first anti-counterfeit tool, but it is not your only one. Pair it with a hardware report and a weight check. If the serial, the hardware, and the physical feel all agree, you are almost certainly holding a genuine unit. If any one of them disagrees, stop negotiating. No discount justifies a device you cannot register, repair, or resell.
Step 6: Refurbished vs Used Electronics: What’s the Difference?
Refurbished and used are not the same thing, and the price gap usually reflects real work that was done. Understanding the difference helps you pay the right amount.
Refurbished means the device was returned, inspected, repaired where needed, cleaned, and tested before resale, often with a limited warranty. Used means the device is sold as-is in whatever condition the previous owner left it. A refurbished unit from a reputable program carries a warranty and a return window. A used unit from a marketplace seller usually carries neither.
| Factor | Refurbished | Used |
|---|---|---|
| Inspection | Full diagnostic and repair | None guaranteed |
| Warranty | Often included | Rarely included |
| Return window | Usually available | Seller dependent |
| Battery | Often replaced or tested | Unknown |
| Price | Higher | Lower |
Buy refurbished when you want predictable condition and a safety net. Buy used when you can inspect in person, you know the model well, and the discount is large enough to absorb a repair.
Step 7: Research Market Value and Negotiate
Market value research protects you from overpaying and gives you the evidence to negotiate. Sellers respond to data far better than to opinions. But the right tactics depend on where you are buying, so treat peer-to-peer marketplaces and professional refurbished retailers as two different games.
Tools for checking resale value
Check completed and sold listings, not active asking prices, since asking prices are aspirational. Compare at least five recent sales of the same model and condition tier. Factor in accessories: original chargers, boxes, and cables add real value, while missing accessories should reduce your offer. For appliances, check the manufacturer’s current retail price and the typical depreciation curve for that category, since large appliances hold value differently than phones.
Platform-specific negotiation tactics
Peer-to-peer marketplaces (individual sellers):
- Open with market data, not a lowball number. “The last five sold between $X and $Y” lands better than “I’ll give you $Z.”
- Name the specific defects you found and their repair cost. A battery below 80% health is a concrete, quantifiable flaw.
- Ask what is included, then price the gaps. A missing charger is a $20-$40 replacement on most laptops.
- Be ready to walk away, and mean it. Peer-to-peer sellers often have emotional attachment to the price they set.
- Offer a fast, clean transaction in exchange for the discount. Same-day pickup with cash is worth real money to a motivated seller.
- Never negotiate before you have inspected in person. A price agreed over chat is not a price agreed.
Professional refurbished retailers:
- Negotiation is usually limited, but price-match policies and coupon codes are common. Ask directly.
- Focus on the warranty and return window instead of the price. A 90-day warranty is worth more than a 5% discount.
- Check the grade tier (A, B, C) and confirm what each grade means for that specific retailer. Grades are not standardized across the industry.
- Ask about the battery replacement policy. Some retailers replace batteries below a threshold; others do not.
Turning identified flaws into a dollar figure
A negotiation without numbers is just haggling. Build a simple repair-cost estimate before you make an offer:
| Flaw | Typical repair or replacement cost | How to use it |
|---|---|---|
| Battery below 80% health | Replacement battery plus labor | Deduct from asking price |
| Cracked screen or bezel | Panel replacement | Deduct, or walk away if severe |
| Worn charging port | Port replacement | Deduct; common on thin laptops |
| Missing charger or accessories | Replacement cost | Deduct the retail price of the missing item |
| Out-of-warranty status | Value of lost coverage | Deduct a percentage of the price |
These are estimates, not quotes. Get a real repair quote from a local shop if the flaw is significant, and bring that quote to the negotiation.
Device-category nuances
- Phones: Battery health and carrier lock status drive most of the value. A locked phone is worth far less than an unlocked one.
- Laptops: Cycle count, RAM soldered vs. upgradeable, and screen condition matter most. A laptop with soldered RAM and a worn battery is a poor long-term buy.
- Appliances: Age, energy efficiency, and whether parts are still manufactured matter more than cosmetic condition. A 10-year-old appliance with discontinued parts is a liability.
The strongest negotiation move is a printed or screenshotted battery report and a warranty lookup. Sellers rarely argue with their own device’s data, and it moves the conversation from haggling to problem-solving. Pair it with a repair quote for any significant flaw, and you have a number the seller cannot easily dismiss.
Common Mistakes to Avoid When You Vet Electronics
Most bad purchases trace back to a handful of repeatable errors. Avoid these and your hit rate improves immediately.
- Skipping the battery check. It is the most expensive wear item and the easiest thing to hide.
- Trusting listing photos. Ask for timestamped photos of the actual unit, including the serial number.
- Ignoring the update window. A device past its support end date will not stay secure.
- Buying on impulse. Impulse buying is the enemy of a good deal. Sleep on it, then verify.
- Paying before testing. Never send money before you have run the diagnostics yourself.
- Overlooking the return policy. A no-return listing removes your only safety net.
Meeting in a public place is not enough on its own. Bring a friend, keep the transaction in daylight, and never share account passwords or factory-reset credentials before payment clears. Once you buy, perform a factory reset yourself to clear any lingering accounts or tracking profiles.
Frequently Asked Questions
What are 5 important things to consider when buying a computer?
Check processor generation and RAM, battery health if used, available ports, operating system support lifecycle, and warranty coverage. For used machines, run diagnostic tools to verify hardware performance and look for signs of component wear. Always confirm the serial number matches the model specifications and that the device has not been reported stolen.
How can you tell if a refurbished electronic device is reliable?
Look for manufacturer-certified refurbished status, a warranty of at least 90 days, and a battery that holds at least 80% of its original capacity. Ask for diagnostic test results or run your own checks on battery health, screen burn-in, and connectivity ports. Reputable sellers provide a return policy and disclose any replaced components.
What red flags should you look for when buying electronics online?
Watch for prices far below market value, stock photos instead of real device images, sellers with no return policy, and listings that avoid mentioning the serial number. Fake electronics often have mismatched model numbers, poor casing integrity, or missing original accessories. If the seller refuses to provide a video call demo or diagnostic screenshots, walk away.
How do you verify the warranty status of a used electronic device?
Get the serial number from the seller and enter it on the manufacturer’s warranty lookup page. Check the purchase date and whether the warranty is transferable. Some brands require original proof of purchase. If the warranty has expired, factor in potential repair costs and consider a third-party warranty or extended coverage.
Vetting electronics well is a skill, and it takes practice to build the habit of checking battery cycles, warranty status, and serial numbers every single time. Greenmatrax.com exists to remove that friction, with carefully reviewed and selected quality gadgets, aggregated tech deals that save you from searching multiple websites, and a focus on genuine value and reliable performance. Get started with Greenmatrax.com and find tech you can trust without the guesswork.